Ceiling fans are great accessories in keeping the air cool in the summer season and circulation of warm air during the winter. Many homeowners have found out how popular ceiling fans are due to the year-round energy-savings thus reduction of the energy bills while not forgoing the comfort. As a homeowner, you might not be familiar with wiring the light fixtures either at holding together the fan motor while standing on a ladder. However, when you make enough preparation and research on how to install it, the task will be a success. Though it might require some hours for installation, it is worth it as it pays immediately after the exercise is done. The following are the tools you require and a step to step on how to install a ceiling fan.

What Do You Need to Install A Ceiling Fan?
With the prior purchase of your desirable ceiling machine of the right size, style, and finish, there are basic tools that come in hand when doing your installation. The tools are a guarantee of a safe project with ultimate success and finish in time. Below are the tools required for a ceiling fan installation.
1. Wire cutters.
These are used when denting and wedging wires apart. During the down rod assembly, they become useful by cutting and stripping the ceiling fan wires.
2. Screwdrivers.
They are commonly used to turn or drive screws. They are mostly used to tighten and steady the screws to ensure that the fans motor housing and blades do not shake or wobble whatsoever.
3. Ladder.
It is used when performing wiring on where to locate the fan when mounting brackets and hanging the motor assembly.
4. Pliers.
They hold the objects firmly in place. During down rod assembly, they got into use by tightening the set screws and locknuts.
5. Safety glasses.
In the process of installing the fan, hazardous materials and debris may fall or fly your way. These goggles save your eyes from these materials.
6. Crescent wrench.
It is used in tightening any brace or bolts. This is due to the adjustable screw that takes the shape or the width of bolts from left to right by moving the jaws.
7. Voltage tester.
These are appliances used to test if electricity is running in the wires during installation.
8. Electricity drills.
For installation of the utility box to where the ceiling fan is to be located, requires drills. Thus, the tools are significant in drilling various holes in materials.
9. Dusk mask.
It protects you from inhaling dust or other debris during installation and cleaning.
10. Electrician tape.
This is generally an electrical tape that insulates the wire connections while it is pressure-sensitive and flexible.
What is the Best Ceiling Fan Size for Your Room?
 It is important to choose a good ceiling fan size that will match the size of the room. Since the ceiling fans come in different sizes, it might be challenging when determining the best-suited one for your home. Generally, the ceiling fan blade tips should have an allowance of 30 at least 30 inches from the walls and should be 7 feet above the floor.
So,
If your room measures 75 sq. feet or less, then your preferred ceiling fan size should be in the range of 29 to 36 inches blade diameter. The rooms that fall under the range of 76 to 144 sq. feet will match with a blade diameter of 37 to 43 inches.
If your room size falls between 145 to 225 sq. feet, you should go for a ceiling fan with a 44 to 49-inch blade diameter. For rooms that measure 226 to 400 sq. feet, the appropriate ceiling fan blade diameter should be 50 to 54 inches.
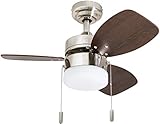
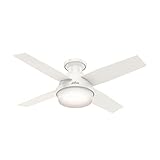
Best ceiling fans for small rooms recommend:


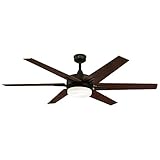
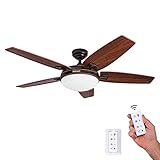
Top-rated large ceiling fan for large rooms:


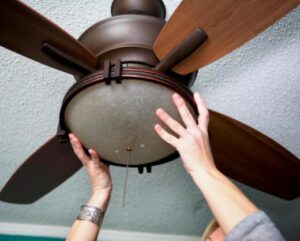
Step by Step Guidelines on How to Install a Ceiling Fan.
When you have a ceiling that has a wiring fixture or outlet and you can access the ceiling that you want to attach the fan to in an overhead area, then have the fun of installing the fan yourself. You can have any kind of box for your ceiling or use an adjustable hanger bar. It is important to note that before you start any kind of installation turn off the power at the control panel.
Things to consider before running the ceiling fan installation
- The ceiling fan’s blades should hang at least 8 inches and be at least 18 inches away from the room’s walls and other obstructions.
- Ensure that the place of installation is in good condition such that it should not have any cracks.
- The ceiling fan should be hanged at not less than 7 feet from the floor.
- The ceiling fan should provide optimal airflow.
Step 1: Remove the light bulbs or shades and the light fixture in existence.
Carefully remove any light bulbs in the fixture from the ceiling and then unscrew the screw which is holding the old light fixture at the base. Lower the fixture from the ceiling and disconnect the wires by twisting the plastic connector from the end wires.
Step 2: Remove the old fixture and the electrical tape or wire nuts.
Remove the old electrical box from the ceiling and ifs it’s nailed to a joist, pry it free with a flat bar. In case it is suspended from a bar, take off the metal plate and unscrew it and pry the bar at the joists. Afterward, the wiring from the fixtures is covered with electric tape. Remove the wiring nuts by disconnecting them from the ceiling fixture.
Step 3: Attach the new ceiling box.
The box is set into the hole where the old fixture was and is pressed in tightly against the underside of the joist. After attaching the box, screw it with a drill. Allow the cable wires from the hole go through the box on to the downside.
Step 4: Assembling fan motor and canopy according to specific orders by the manufacturer.
Step 5: Insert wires through cowling and then the mounting down rod.
Ensure to insert the down rod at the top of the motor housing on the fan. It is secured firmly above the motor by using a bolt or a stud that is screwed together.
Step 6: Attach the fan into the mounting bracket, if applicable.
Before working on any wiring some fan kits are needed to hold the fan as you are working on wiring. There is a hook on the underside of the mounting bracket, put the hooks through several screw holes in the cowling cover, they hold the motor up while doing your wiring connections. However, if your fan does not have these features, then you need a partner to help you while connecting the wires.
Step 7: Connect the ceiling wiring to the fan’s wiring.
The basic ceiling fan wiring is similar to the light fixtures. The wires come in a variety of four that is, the black wire with live power, the white one representing the neutral and green for ground. There are also blue wires for fan light fixtures. Insert a blue and a black wire into a wire connect and twist them to tug firmly. Carefully connect the white wires in the ceiling fan to the light fixtures, similarly to green or bare wires, and the black wires.
Step 8: Attach the fan blades and light kits.
Insert one fan blade into the blade iron that is the blades bracket and then tighten the screws provided to fasten the blade iron. Then repeat the process for each blade until the fan blades are securely attached to the fan motor. Plug the light-fixture housing from the wire hanging from the underside of the fan motor. Then you install your bulbs or shades. Turn on the power and test the installation.
How Long Does It Take to Install a Ceiling Fan?
Determining the exact installation duration depends on various factors, but generally, it will take you about 2-3 hours. But if you hire an expert, then it will take a maximum of 2 hours, so basing on these factors, you will be able to determine the exact time.
The ceiling fan quality;
will impact the assembly time such that if your ceiling fan comes with more parts and pieces that should be put together, it will probably consume much time. You should also be vigilant when dealing with small screws because if you drop them, you might spend the rest of the day looking for them. So, be sure to assemble it appropriately to avoid repeating the process.
The design and the ceiling height;
some ceiling fans require assembling on the floor while other systems get assembled on the ceiling; therefore, assembling on the ceiling consumes much time compared to the one assembled on the floor. When it comes to the height, the greater the size, the more it will swallow much time since you will be moving tools and parts up the ladder.
Do you have an electric outlet ready?
If yes, then it will even take less than two hours to fix since you will only be required to set the fan, join the cords, and you are good to go. But if you don’t have an electric outlet ready, you will probably consume much time.
Are you a beginner or an expert?
If you are running the installation for the first time, it will take a lot of time, but it will take you less time if you are a technician.
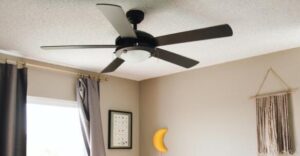
Best Easy Installing Ceiling Fans Recommend


Conclusion
If you are intending on buying a ceiling fan for a cool breeze around your home, walk by the ceiling fan display which enables you to access different accessories with a variety of designs, colors, and styles. Choose the blade diameter that better suits your place and enjoy the efficient and durable ceiling fan. Through thorough following of the instruction, you will be able to install the ceiling fan of your desire. It is a relatively easy task that immediately pays off. You are in need and wondering who will assist you with installation, follow the above guidelines, and realize how easy it is by yourself.