A ceiling fan is an incredibly functional and stylish gadget to attach to your house, particularly during summer. Hence, if you are having a worn-out or a fan that is not working, consider changing it. In other cases, you might come across a trendier air cooler and feel like replacing it with the traditional ceiling fan in your home. Notably, the process of changing a ventilating fan is challenging but when you follow the guidelines, it will become easier.
Steps to Follow on How to Change out a Ceiling Fan
Step #1. Switch off the power source
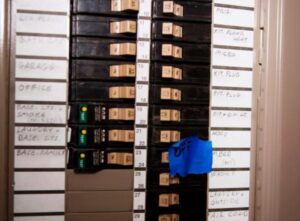
When you are dealing with gadgets that are already mounted, this is a crucial step. Note that, you don’t want to work with live wires since they are not safe. Therefore, turn off the power to your ceiling fan from the breaker box and proceed with the procedure. Also, consider using a voltage test as a way of double-checking that no current will run to the fan. Additionally, if there is an electricity outage in the place you live, ensure that the power button is flipped from on to off in case the lights are back before the project is over.
Step #2. Disconnect existing fan
Usually, you will need screwdrivers for this step and a helper if possible. Keep in mind that you are unscrewing a device that is firmly attached to your ceiling, hence you require to apply energy. Securely take the screws off the fan without interfering with material that has grounded it. Remember to take pictures of the connected wires since you will need them when installing the other ceiling fan. Also, if you are having doubts about the existing electrical box, consider removing it and purchasing a suitable one.
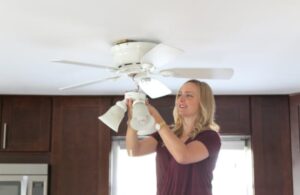
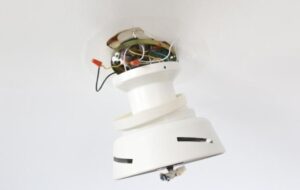
Step #3. Takedown the air cooler
After a successful disconnection, you are required to move the ceiling fan off the attaching bracket. Notably, look for someone to help you lower down the fan carefully without damaging it since you might need it in the future. While removing it from the ceiling, hold the places that are not fragile, and slide it free. How easily you will take down the fan depends on the model you had installed, since some are easy to pull off from the brackets while others require a bit of energy.
Step #4. Change the ceiling brackets
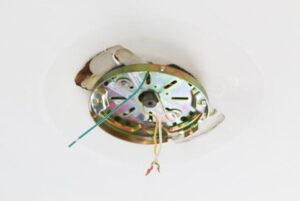
One of the first things that you will install for the new fan is a bracket. Remember that each ceiling fan has its bracket that fits perfectly. Hence, it is a must to take down the existing ceiling plate leaving a room for the new one. However, avoid interfering with the mount that has kept the ceiling in place since the latest support will still fit perfectly. Also, the air cooler comes with screws that you will use to secure it in the box. Take the wires from the ceiling and pass them through the center hole of the bracket the same way they were assembled in the old fan.
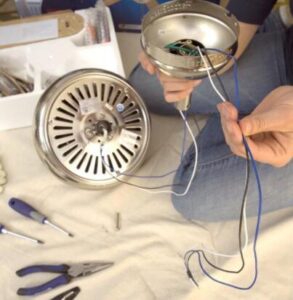
Step #5. Prepare to install your ceiling fan

Before mounting your air conditioner, you should work on threading the wires. Place it on a flat surface and look for the wires coming from the motor. Insert them in the canopy and run the wires through the down rod. Notably, a down rod allows you to hang your ceiling fan high or at any angle that you desire.
Make sure to pull the wires up. Use a wire cutter to make them shorter and a wire stripper for scraping them. In case the air cooler is wobbling, use the locking screw near the motor to tighten up the downrod into place. Also, read the guidelines on the ceiling fan since the make or model might be different from others.
Step #6. Attach the fan canopy
Lift your fan base to the ceiling. While bringing it up, have someone to support the air cooler form below to make it easy to attach it. Most ceiling fans will allow you to slide it in the bracket without struggling hence you won’t hold it while connecting the wires. Once the canopy is safe, start working on the cables.
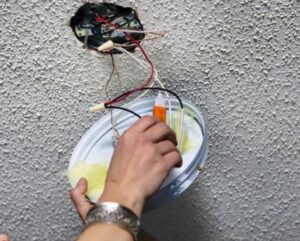
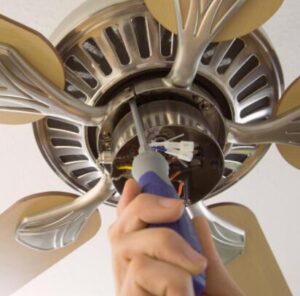
Step #7. Connect the wires
There are wires from the ceiling, fan, and those from the inside of the air conditioner. Hold the ends and twist them together, use a wire nut if possible. After finishing, use the available wire caps to make it a secure connection. Notably, the colors you will use while connecting depend on the ceiling fan model that you are using. Hence, if you are not sure, confirm from the instructions provided.
Step #8. Mount the blades
Now it’s time to make it look like an actual ceiling fan. Attach each of the blade brackets to a fan blade. Use a screwdriver to tighten the available screws making the blades firm. Keep in mind that anything loose will make the ceiling fan to shake or even fall. If the blades are reversible, decide how they will face according to your preferences. Also, for accuracy purposes, follow the directions given by the manufacturers in the manual. Additionally, place something underneath the fan, such as a cloth, to hold the screws should they tumble.
Step #9. Installing ceiling fan light

After accurately mounting your fan, put a bulb for lighting reasons. Take out the switch housing cover plate from the fan. Then, remove a plug located at the center of the plate. Notably, the plug has wires which you will use to connect to the electricity. Add a light bulb and attach the plug to the power source. Attach the cover plate over the housing kit and make sure it clicks in place. According to the instructions provided by your manufacturer, you might be required to screw in the light kit.
Step #10. Turn on the power
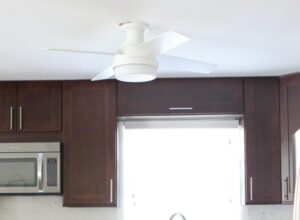
Once you are sure that everything is connected accordingly, turn the power back on. Note that, the primary purpose of this step is to ensure that your fan is working the right way. Check whether the blades are rotating as they should. Also, ensure that your bulb is lighting up properly. Ensure that all parts of the air cooler are tight and the wires are not hanging out. If the fan is functioning as it should, then your hard work paid off.
If you want to change a ceiling fan, follow the instructions above. Don’t worry since all it takes is your free time, patience, tools, a fan, and a person who will assist you in getting the job done. Make the hot days stimulating by changing out your old air conditioner and replacing it with an elegant fan. Notably, if you are struggling to install the ceiling fan, reach out to a skilled technician who has experience in this field.