Ceiling fans are available in two types: ball-in-socket ceiling fan and flush-mounted, and the method of uninstalling each is a bit different. Safely take apart a ceiling fan can be hard.
In this guide, we will discuss the steps of how to uninstall a ceiling fan and the safety tips to keep in mind while uninstalling.
How to Uninstall a Ceiling Fan with Flush-mount?
Before you start uninstalling your ceiling fan, you should compile everything you will require. The tools you will need will depend on the type of installation your fan has and if it has inbuilt lighting fixtures or not.
Generally, you will require a ladder, pliers, a screwdriver, and a voltage tester.
A flush-mounted ceiling fan is mounted on a ceiling with a height of around 8 feet high. In this fan type, the motor sits on top of the blades and is installed directly to the ceiling.
Below are the steps of safely removing a flush-mounted ceiling fan.
Step 1: Switch off the power
Before you begin tampering with the fan, you should always turn off the power source. Similar to all electrical related tasks, your safety should come first.
Double-check if you have turned off the right switch by trying to run the fan.
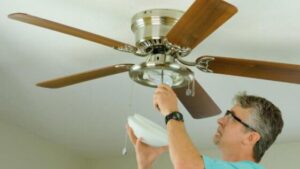
Step 2: Uninstall the bulbs and light covers
If your ceiling fan has inbuilt lighting, you should remove them in this step. The lighting system consists of light bulbs and a light cover.
First, remove the dome cover by unscrewing it carefully and handing it over to your assistance.
Then remove the lightbulbs carefully without putting too much pressure since they are very fragile and break easily.
Step 3: Disengage the light kit
The lighting kit houses the fan light wiring. You will need a screwdriver to unscrew all the screws attaching the fan light kit to the body in this step.
After unscrewing, remove this cover from the fan.
Step 4: Unhook the wires
After removing the light kit, the wires get exposed. At this step, disconnect the cables connected to the fan using wire nuts from the electrical box.
Remove those nuts by twisting them in the anti-clockwise movement.
Step 5: Remove the fan blade
Many flush-mounted ceiling fans have their blades connected to their body using metal brackets. To remove it, unscrew the screws securing the fan bracket to the fan body using a screwdriver.
If you are planning to reuse the fan at another time, you should keep the blades attached.
Step 6: Loosen the screws holding the fan body to the ceiling
First, loosen the screws attaching the bracket to the ceiling, and ensure you have a good grip on the fan.
Many fans nowadays have a hinge on one side of the mounting bracket that holds the fan body after unscrewing.
That enables you to disconnect the fan wiring without the need to hold the entire fan while disconnecting.
Step 7: Remove the wire nuts
At this step, you unscrew the wire nuts that connect the wires from your fan’s electrical and the ones from your ceiling.
Unscrew the nut by turning them counter-clockwise until they loosen up.
Step 8: Remove the fan body from the mounting bracket
After disconnecting the wire, de-attach the fan body from the hinge on one side of the mounting bracket by unscrewing and lower it to the floor.
Step 9: Remove the mounting from the ceiling
Finally, detach the fan mounting bracket by unscrewing the screws that attach it to the electrical box in your ceiling, and the mounting bracket will slide off.
How to Uninstall a Ceiling Fan with the Socket?
This type of ceiling fan is suitable in rooms with ceiling heights of more than eight feet. It has a down-rod that drops the fan from a high ceiling.
Below is a step by step guide on how to uninstall this ceiling type.
Step 1: Turn off the electrical power
Before you start uninstalling any part of your fan, start by turning off the electricity.
Step 2: Remove the metal canopy
The metal canopy is the part that houses the mounting bracket that attaches the fan body to your ceiling. Use a screwdriver to unscrew the fan canopy.
Once you unscrew, the metal canopy will slide and rest on the top of the fan body as you disassemble the other parts.
Step 3: Detach the wire nuts
Unscrew the wire nuts that connect the wire from the electric fan box and those from the ceiling by twisting them in a counter-clockwise direction.
Step 4: Remove the fan ball
This fan has a ball on the upper side of the down rod. Slide off the ball upward and take it out on the mounting bracket. Ensure you grab hold of the fan tightly when doing that.
Then lower the fan to the floor or pass it to your assistance if you have one.
Step 5: Remove the mounting brackets
Usually, mounting brackets are fixed to the electrical ceiling box using two screws.
Unscrew the screws and remove the mounting bracket.
Safety Tips
Regardless of the type of ceiling fan you are uninstalling, there are some safety tips you should keep in mind.
Below are some of the safety tips.
- It is advisable to turn off the main breaker’s power and lock it to prevent others from turning on the breaker.
- Use a voltage tester or socket tester to ensure the circuit is off before you start working on any wires.
- Use high-quality tools while uninstalling your ceiling fan because low-quality tools are prone to breakage and result in accidents.
- It is advisable to buy tools coated with rubber handles. That can prevent electrocution in the case of statics.
Conclusion
The above is a guide on uninstalling a flush-mounted ceiling and a ball in a socket ceiling fan. Follow the above steps, and the installation process will turn out to be easier and safe.